This can be split into one or two lessons. With my youngest kids we spend the first lesson learning the vocabulary and the second building the snowman. Extra time can be filled with the snowman song or book (see snowman—part two).
Learning the vocabulary
I start by eliciting the word snow-either in English or the kids’ native language (pantomime or pictures work well here if you do not have a common language to fall back on). Then I pantomime making a snowball to get to snowball. I take out a small Styrofoam ball. The children throw (or roll) it to each other and whoever catches it has to say “snowball” before passing it on. Once everyone has had a turn, I put the ball away and say “I say snowball, you…” and pantomime throwing a snowball.
Then I ask what we can make out of snowballs. Once we get to snowman, I draw three balls on the board (or a piece of paper, depending on the teaching situation). I ask the kids if we need anything more. The first things I accept are eyes, nose, and mouth (in any order). After I add each one to the drawing, I say “I say nose (eyes, mouth), you…” and point to my nose (eyes, mouth). I then mix all of these with snowball. Once this is going well, I turn it around. I do the motion and they say the word.
We then add scarf, arms, broom, hat, and buttons (again in any order). These are the ones where they not only make the motion but say the word. After each word, we do a mixed-up series of all the ones they have learned so far. The motions are as follows:
Scarf—a wave-like motion of the hand while saying “S-s-s-s-scarf”
Arms—right arm extended, left arm extended, both arms in a stretch up and out to the sides while saying “Arm, arm, arms!”
Broom—fists move in a sweeping motion while saying “Broom, broom!” (like “vroom, vroom!” of a car)
Hat—arms up and hands out (like “I don’t know”), hands tap the head and move out again while saying “Hat, hat, hat.”
Buttons—hands in fists moving in circles, hips swaying while saying “Buttons, buttons, buttons.” like a conga line.
Building the snowman


Your creativity will need to work around the materials available to you. I will list what I used.
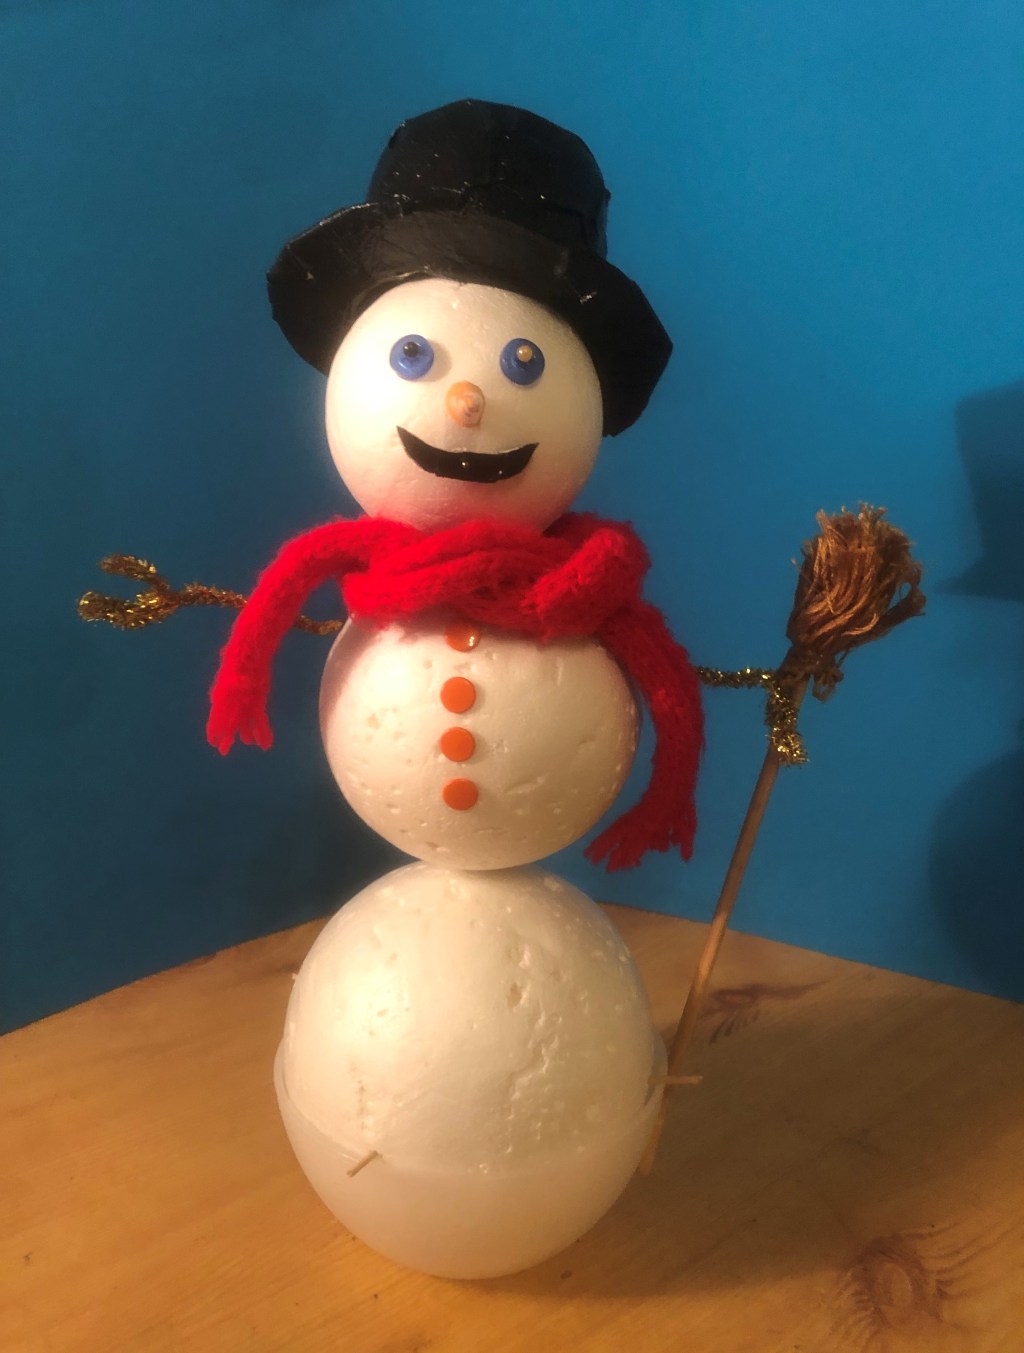
Snowballs—three Styrofoam balls of different sizes. These can be stuck together using toothpicks. The bottom one is anchored in a bowl by inserting toothpicks around the edge-
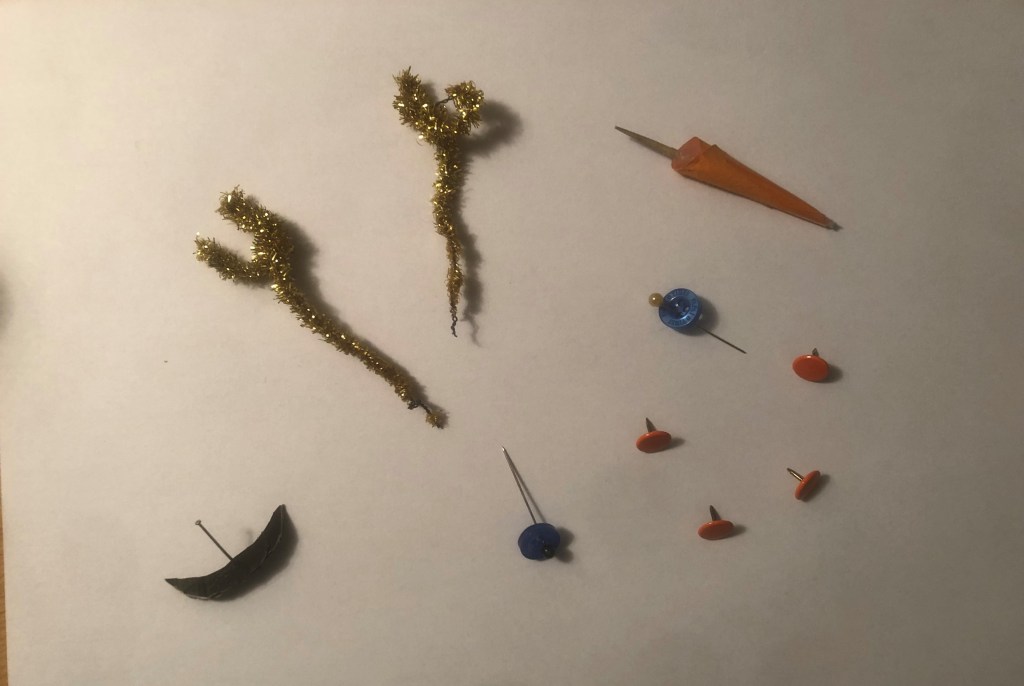
Nose—orange construction paper rolled into a small cone and taped shut, then filled with hot glue with a toothpick inserted into it.
Eyes—buttons with pins to stick through the holes.
Mouth—a smile cut out of leftover pieces from the hat and covered with black duct tape with a pin stuck through it for insertion.
Scarf—I knitted a little one, but you could use any scrap of cloth.
Arms—pipe cleaners twisted into shape.
Broom—a chopstick with yarn cut to shape and hot glued to the top.
Hat—a yoghurt container cut and taped to the correct shape then covered in black duct tape. toothpicks taped to the inside enable it to be stuck on the head.
Buttons—tacks.
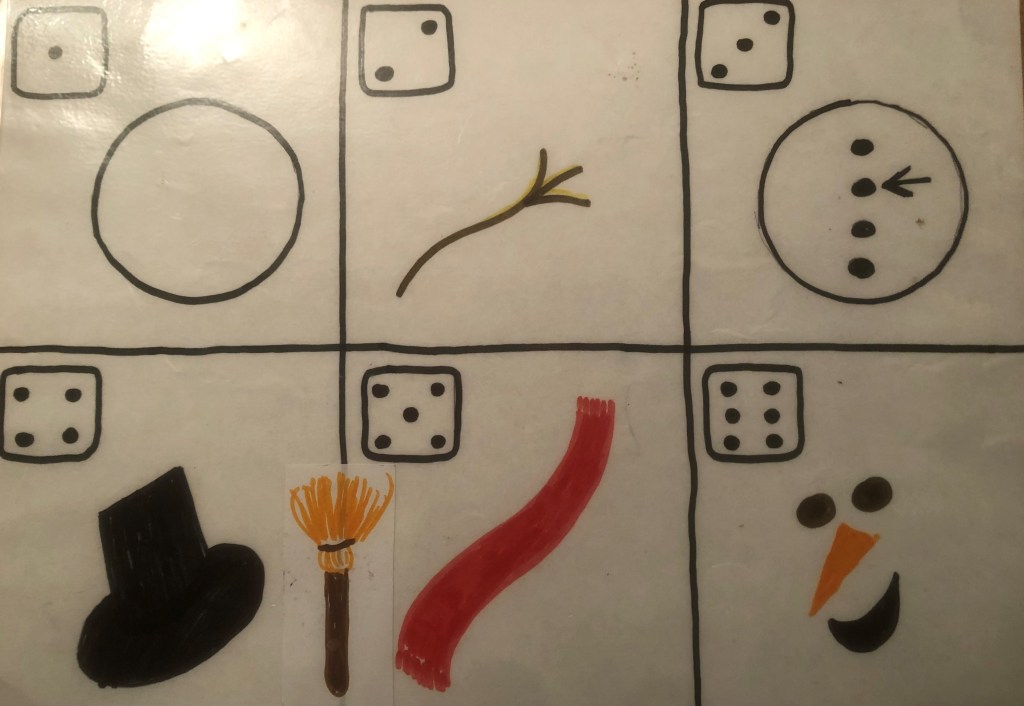
The children take turns rolling the die. Only the child with the die may answer. She first tells me the number she has rolled. The chart shows what it corresponds to. If she knows the name in English, she may build this part of the snowman. If not, it is the next child’s turn. With very young children if they do not know the name I tell them, they repeat it, and they may build it.
If there is still time, the snowman can be taken apart either by kids who know the name of parts or by me (at which point the snowman usually “comes to life” and becomes quite upset with me for taking him apart until I remove his mouth).
